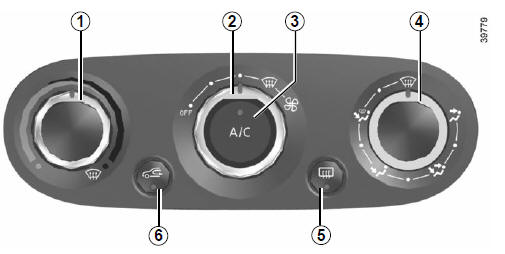
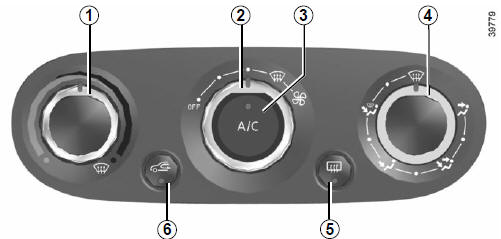
Renault Clio: Manual air conditioning
The controls
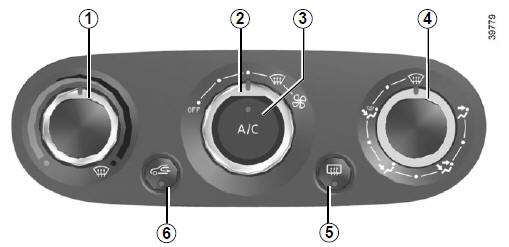
- Adjusting the air temperature.
- Adjusting the ventilation speed.
- Air conditioning.
- Distribution of air in the passenger compartment.
- De-icing/demisting of the rear screen and, depending on the vehicle, the door mirrors.
- Air recirculation.
Switching air conditioning on or off (depending on vehicle)
The air conditioning is switched on (indicator light on) or off (indicator light off) using button 3.
Activation is not possible if control 2 is set to OFF.
The air conditioning system is used for:
- lowering the temperature inside the passenger compartment;
- eliminating condensation more quickly.
Distribution of air in the passenger compartment
There are five air distribution options.
Turn control 4 to choose the distribution option.
 The air flow is directed to the
windscreen and the front side
window demisting vents.
 The air flow is distributed
between
all the air vents, the
front side window demisting vents, the
windscreen demisting vents and the
footwells.
 The air flow is directed mainly
towards the footwells.
 The air flow is directed towards
the dashboard air vents, the
front footwells and, depending on the
vehicle, the second row footwells.
 All the air flow is directed to
the
dashboard vents.
Switching the air recirculation on
Press button 6: the integrated indicator light comes on. In these conditions, air is taken from the passenger compartment and is recycled, with no air being taken from outside the vehicle.
Air recirculation is for:
- isolating the vehicle from the external atmosphere (driving in polluted areas, etc.);
- lowering the passenger compartment temperature as quickly as possible.
| Prolonged use of air recirculation can lead to condensation forming on the side windows and windscreen, and discomfort due to the use of non-renewed air in the passenger compartment. We therefore advise you to return to normal mode (external air) as soon as the air recirculation function is no longer required, by pressing the button 6 again. |
Adjusting the ventilation speed
Move control 2. The further the control is positioned to the right, the greater the amount of air blown into the passenger compartment. If you want to shut off the flow of air, set control 2 to OFF.
The system is deactivated: the ventilation speed is zero (vehicle stationary).
You can, however, still feel a slight flow of air when the vehicle is moving.
Rapid demisting
Turn controls 1, 2 and 4 to positions
 :
:
- air from the outside;
- maximum temperature;
- demisting.
Positions  and and
 prevent air recirculation prevent air recirculation
mode to avoid any risk of condensation forming on the windscreen and triggers the air conditioning function. The integrated light in button 3 does not come on. |
Adjusting the air temperature
Turn control 1 to obtain the desired temperature. The further towards the red the slide is, the higher the temperature will be.
When the air conditioning system is used for long periods, it may begin to feel cold. To increase the temperature, turn control 1 to the right.
Rear screen de-icing/ demisting
With the engine running, press button 5. The operating tell-tale comes on.
This function permits rapid demisting/ de-icing of the rear screen and de-icing of the door mirrors (on equipped vehicles).
To exit this function, press button 5 again.
Demisting automatically stops.
READ NEXT:
 Automatic climate control
The controls
Automatic mode.
Air temperature adjuster.
“Clear View” function.
Passenger compartment air distribution
adjustment.
Air conditioning control.
Adjusting the ventila
Air conditioning: information and advice on use
Advice on use
In some situations, (air conditioning
off, air recirculation activated, ventilation
speed at zero or low, etc.) you may
notice that condensation starts to form
on the windows and wi
Electric windows
These systems operate with the ignition
on or off, until one of the front doors
is opened (limited to about 3 minutes).
Safety of rear occupants
The driver can prevent operation
of the
SEE MORE:
Sequential gearbox gear lever: Removal - Refitting
K9K, and JA5
REMOVAL
I - REMOVAL PREPARATION OPERATION
Disconnect the battery (see Battery: Removal - Refitting)
(MR 392, 80A, Battery).
II - OPERATION FOR REMOVAL OF PART
CONCERNED
Remove the gear lever cover (1) using a screwdriver.
Disconnect the gear lever lighting connector (2).
Plugs: Removal - Refitting
D4F, and 740 - D4F, and 784 or 786
Spark plug electrode gap
REMOVAL
I - REMOVAL PREPARATION OPERATION
D4F, and 784
Remove the turbocharger air outlet pipe bolt (2) from
the inlet distributor.
Remove the turbocharger air outlet pipe clip (3) from
the turbocharger.
Note:
If the clip (4) is re
