Fiat Punto: Roof rack/ski rack
Fiat Punto Owners Manual
FASTENERS
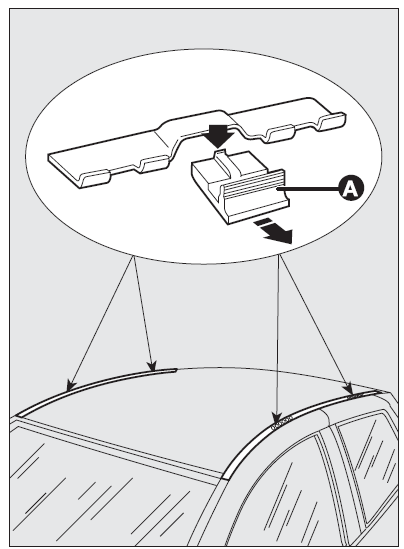
3-door versions
Move the seal aside in the points shown in the figure to reach the fasteners.
The rear fasteners are in the areas indicated by the printed
 reference
mark  on the rear side windows.
To make use of the presetting couplings, remove the retainer (A) by operating on the relevant catch as shown in the figure.
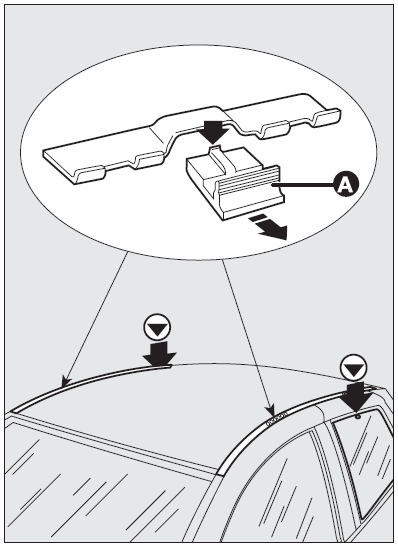
5-door versions
Move the seal aside in the points shown in the figure to reach the fasteners.
The rear fasteners are in the areas indicated by the printed reference
mark on the rear side windows.
Attach the roof rack brackets to the fasteners.
To make use of the presetting couplings, remove the retainer (A) by operating on the relevant catch as shown in the figure.
After few kilometers, check that fastening screws are firmly tightened.
IMPORTANT Follow the instructions provided in the kit to the letter for both versions (3 and 5 doors).
Fitting should be entrusted to skilled personnel.
IMPORTANT Never exceed the max. permissible loads (see section “Technical specifications”).


Other info:
Peugeot 208. Fitting roof bars
When fitting transverse roof bars, take care to position them correctly on the
retaining pins located in the door apertures.
Use accessories recommended by PEUGEOT observing the manufacturer' ...
Chevrolet Sonic. Safety Function Override
If the battery on the vehicle has been recharged or disconnected, or is not working,
the windows will need to be reprogrammed for the express-up feature to work. Before
reprogramming, replace or r ...
Chevrolet Sonic. Airbag System Check
The airbag system does not need regularly scheduled maintenance or replacement.
Make sure the airbag readiness light is working. See Airbag Readiness Light.
Caution
If an airbag covering is damage ...
Manuals For Car Models
-
 Chevrolet Sonic
 -
 Citroen C3
 -
 Fiat Punto
 -
 Honda Fit
 -
 Mazda 2
 -
 Nissan Micra
 -
 Peugeot 208
 -
 Renault Clio
 -
 Seat Ibiza
 -
 Skoda Fabia
 - Honda Pilot
- Volkswagen ID4
- Toyota Prius